Decal Application Steps
You can download or print our downloadable instructions here.
Vinyl decals are best used on wood, glass, metal, plastic, and other smooth surfaces.
Your vinyl decal consists of 3 separate layers:
1-The top layer is the clear transfer tape
2-The middle layer is the vinyl decal
3-The bottom layer is the backing paper

Step 1-Clean
Thoroughly clean the surface that you wish to place the decal on, and allow to dry completely.

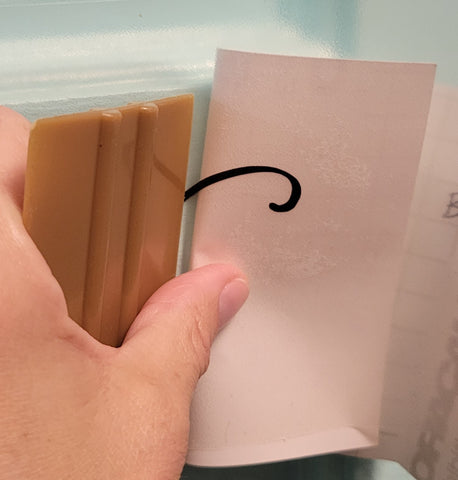
Step 2- Rub Transfer Sheet
Carefully/Gently rub the top of the transfer sheet with a credit card or squeegee until the decal is stuck to the transfer sheet and peels up easily.

Step 3- Peel Backing
Flip your decal over so the backing paper is facing you. Gently peel a few inches of the backing paper off of the decal, ensuring the vinyl sticks fully to the transfer tape.

**Make sure that ALL pieces of the decal are secured to the clear transfer sheet including pieces such as the dot on i and the centers of letters like e and o.

Step 4- Align & Rub
Align the exposed part of the vinyl decal on your clean & dry surface. Then rub the top of the transfer sheet with a credit card or squeegee gently, starting in the middle and working out to the end, until it is stuck to the desired surface.

Step 5- Pull & Smooth
Continue slowly peeling the backing paper away, while smoothing over the exposed vinyl with your credit card or squeegee, working from the middle out, and adhering it fully to your surface.

**Make sure to rub from the center of the edge to the outside edges to avoid air bubbles, and allow the decal to lay flat.
Step 6- Remove Transfer Tape
Carefully lift up one corner of the clear transfer sheet and begin to peel away at a 45-degree angle, keeping the transfer tape flush with your surface. Peel slowly to ensure the decal is adhered to your surface.
If your decal pulls up with the transfer tape, smooth over it again with your credit card or squeegee until it is attached well to your surface.


Step 7- Enjoy
Dispose of your clear transfer sheet and enjoy your amazing new decal!
For best results, allow your new decal to cure for at least 24 hours

Troubleshooting
- When pulling up the clear transfer sheet, make sure ALL pieces are secured to the clear sheet, including the centers of letters such as a, e, etc., as well as the dot on the letters i and j.
- Apply the decal from one side slowly, pressing down from the middle to the edges so that the decal will lay flat without air bubbles.
- If the decal is not separating from the clear transfer tape, try starting from a corner and just peel the decal from the actual transfer tape, then stick that corner to the surface. Once you get a corner on, it's easier to get the rest of it to follow.
- If having difficulty adhering to wood surfaces, make sure the surface is fully cleaned then allow it to stick on the surface of the wood for a few hours, allowing the adhesive naturally to cure to the wood.
- If the decal does not separate from the transfer sheet, rub the surface with your nail and slowly pull pack on the transfer sheet. If needed, you may carefully ease the decal edge off the transfer sheet with your finger nails to get it started.
Check out our vinyl decals at www.SilvasMakerStudio.com